
Are you looking to grow potatoes in your home garden? Not sure where to start, or what variety to pick? First check out our post on Choosing a Potato Variety to Grow in the Home Garden.
If you have a bag of potatoes that you purchased from the supermarket or a local farm stand that have sprouted, you can try your hand at planting them. We’ve grown potatoes that were purchased from the supermarket, and they grew just fine. Keep in mind that if you are buying supermarket potatoes exclusively for plating, they are typically treated with chemicals that prevent them from sprouting. There is also the possibility that you introduce viruses or bacteria into your soil and growing site.
Potatoes can be planted in most zones from the late winter to the early spring; as early as 4 – 6 weeks before the last average frost day for your zone. Potatoes require a cool but frost-free growing season. The ideal growing temperature is between 45° F and 80° F. Weather that is too hot can negatively impact the plants growth and can lead to a reduced number of tubers and a low yield.
In our zone 5 garden we plant our first crop of potatoes in a raised bed as soon as the snow melts and we can work the soil, it’s one of the first crops that we get in the ground. To help speed things up I like to cover my raised bed with a clear plastic sheet – I just use inexpensive plastic sheeting that I purchased at my local hardware store. The plastic acts as a mini greenhouse and helps to warm the soil. Potatoes can handle cool weather and cool soil, but they won’t do much and are prone to rotting if your soil temperatures are below 45°F.
We typically plant our first set of potatoes in mid-April, though some years it’s earlier and other years it later. Living in upstate NY means that we often have unpredictable weather and it’s not unheard for us to have frosts into May, and sometimes even a late spring snowstorm! To help combat the unpredictable weather and to also extend our potato harvest period we stagger a 2nd and sometimes a 3rd planting in the spring. This way if we do get hit with extremely cold weather, we also have a 2nd and 3rd planting to fall back on. Potatoes are hardy and can take some cold weather but will suffer if the tender growth is hit with freezing temperatures!
Preparing your seed potatoes for planting:
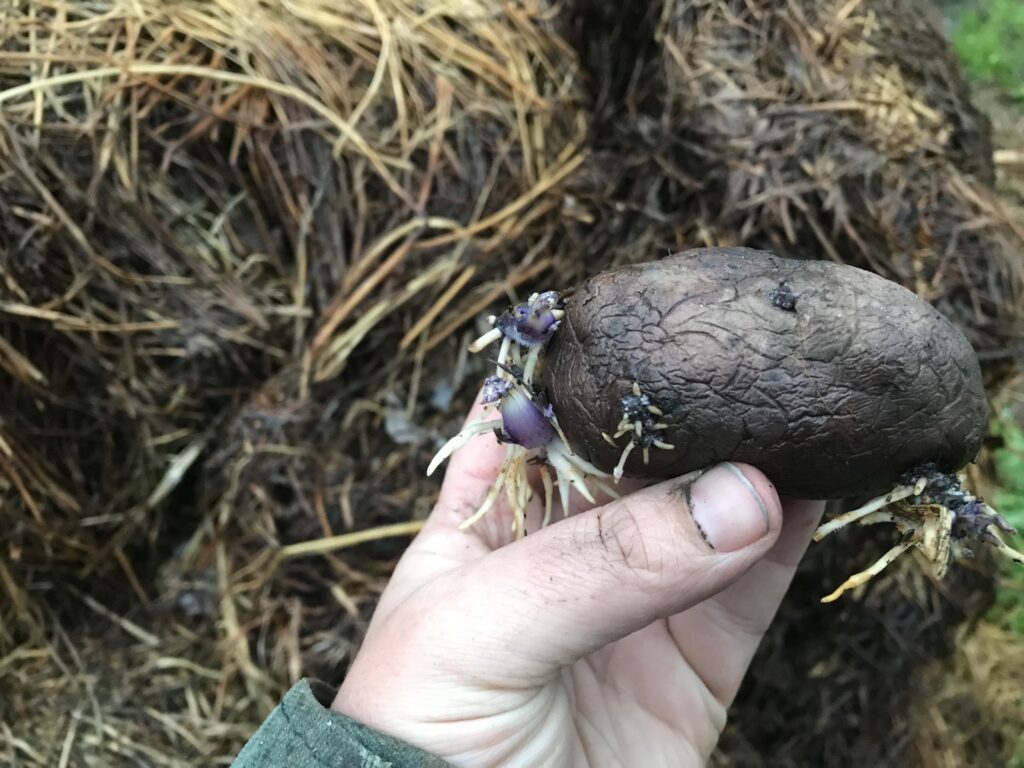
Before you plant potatoes, you have the option to chit them. This is a practice that many gardeners do before planting, but it’s not something that you need to do. Chitting potatoes is sometimes referred to as greensprouting, or pre-sprouting. This process encourages them to sprout before you plant them in the ground. This will give your spuds a head start, encourages faster growth, and can result in a larger yield at harvest time. In areas with short growing seasons, or if you simply want potatoes extra early in the season, chitting can give you a several week head start. Another advantage of pre-sprouting your potatoes is that you’ll know that the seed stock is good, that the seed is viable and that it can grow.
Chtting is an easy process, things to remember are temperature and light. A cool room, that’s not cold, with temperatures around 50°F (10°C) is best. You don’t want your seed potatoes to get too cold, freezing temperatures can kill your shoots. Place your potatoes in a single layer with the side with the most eyes pointed up. You want to place your potatoes in a bright room out of direct sunlight.
A day or two before planting your potatoes any large seed potatoes can be divided into smaller pieces. The process is simple – cut the large potato with a sharp knife into smaller pieces, don’t cut them too small, aim to keep them around the size of a chicken egg, or larger. In order to grow potatoes, you need to ensure that each piece has at least one eye, however two to three eyes on piece is better. Each piece will grow into a potato plant that will produce numerous tubers.
Just like with chitting, you don’t need to cut your seed potatoes into smaller pieces, you can plant your potatoes whole. Cutting them into smaller pieces will help stretch the number of plants that you can grow. Since we usually have more seed potato then we need, and I like to simplify homestead tasks as much as possible, I typically skip this step.
If for any reason you need to delay your planting, move your seed potatoes to a cooler location, this will help to slow down the growth of the sprouts.
Once you cut the potatoes, place them in a single layer in a cool and dry location to heal over and form a callus. This will help prevent the seed potato from rotting in the cool and wet soil in early spring. After a day or two the cut ends will feel dry and leathery to the touch.
When to plant your potatoes:
Potatoes can be planted in the early spring, up to two to four weeks before your last average frost date. Not sure what your last average frost date is? Look yours up by your zip code over at Daves Garden.
Choosing a planting location:
Plant potatoes in a location that receives full sun. Depending on the variety that you grow – early, mid, or late season varieties, you’ll need 75 to 135 (or more days) of frost-free weather. Potato plants prefer well-drained and fertile soil, that is high in organic matter, with a pH of 5.0 to 5.5. Soil that is more alkaline (a pH of 7.0 or higher), can result in a higher potato yield, but can also lead to a higher incidence of scab. This is a condition that affects the skin of the potato.
There’s a lot of information on the internet about the best way to grow potatoes, or ways to grow incredible numbers of potatoes in a small space. A quick google search can leave you dizzy and confused. Here’s the fact of the matter – potatoes can be grown using several different methods, directly in the grown, in straw or haybales, in growbags, or in raised beds. They all have pros and cons.
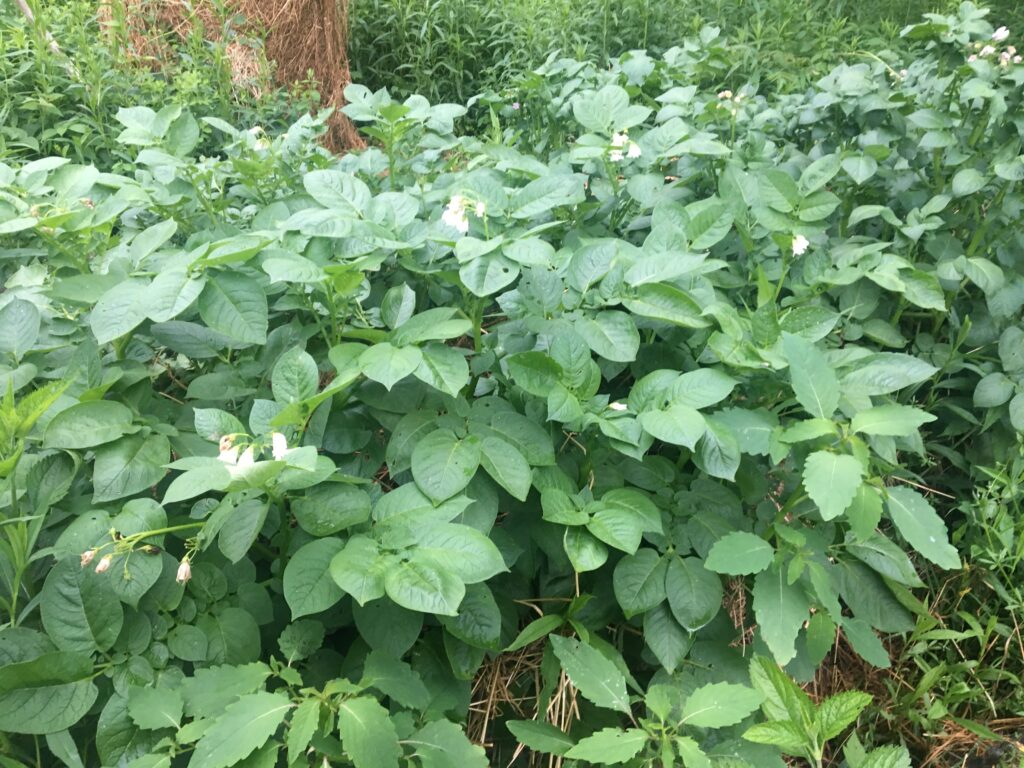
We like to grow our potatoes in raised beds, using a combination of spoiled, or soiled hay from our livestock, compost, and soil. We’ve also had a luck growing potatoes the “traditional way” which is directly in the ground in a trench. However, in our experience, growing our spuds in raised beds is a fast and easy way to plant them, it gives us an early start to the growing season, and they’re a breeze to harvest.
We’ve had limited success growing potatoes in grow bags. In our experience we ended up with stunted and smaller yield, and the bags required a lot of water. The soil would heat up in summer sun and quickly dry out the soil. If you’re short on space and able to keep your pots well watered it is a good and viable option.
We’ve also grown our potatoes in hay that was spread on the ground, planting is very fast and easy. They do require more water than those grown in soil and in our experience this method did result in slightly reduced yield. It’s an effective method for areas that need a lot of soil work or for the gardener that is short on time. We did end the season with lovely compost and soil that had tons of earth worms!
This year, for 2019 were experimenting with growing potatoes in an old round hay bale that we have. They hay is 2 years old and partially composted. It was hay that we purchased for our horse and goats, unfortunately it was baled slightly wet and in a few short days it became a moldy mess that wasn’t suitable for feeding to our animals. As always, I went a little overboard with the amount of seed potatoes that I purchased, not having the space to grow them, or the heart to throw them out, I ended up stuffing the rest of the potatoes in the haybale. They seem to be growing well and I’m hopeful that we’ll get a decent enough harvest from it. I’ll be sure to post updates as the season progresses.
Growing potatoes in a raised bed:
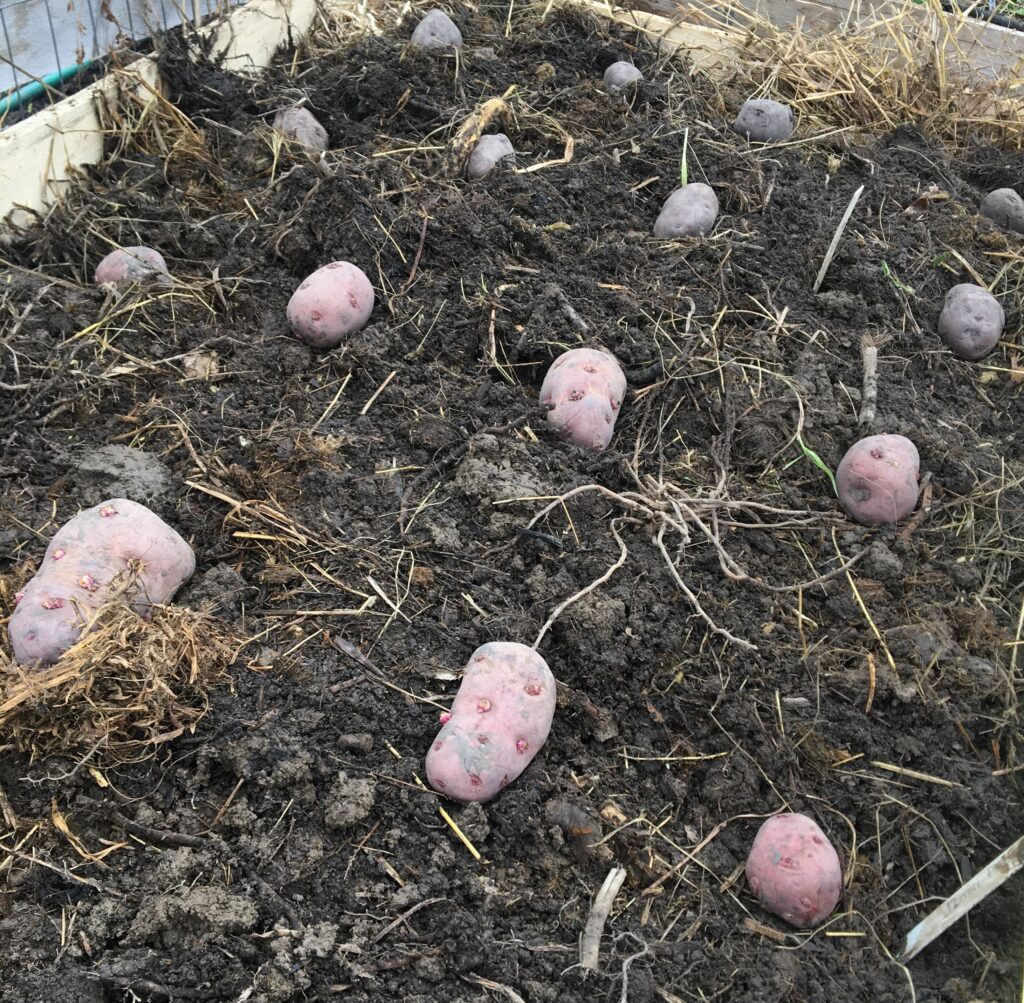
To plant your potatoes place them in a hole about 4 inches deep and cover them with several inches of soil. Space your seed potatoes approximately 8 – 12 inches apart in all direction. Once the sprouts emerge add an additional 2 inches of soil. You can also use spoiled hay, straw, or leaf mulch. We don’t recommend using lawn clippings – the grass tends to mat and makes a slimy gross mess. As the potato plants continue to grow you will need to hill the plants by adding additional soil, or mulch (straw, chopped leaves, or hay). We hill out potatoes with spoiled hay from the barnyard that they animals have dropped on the ground and trampled.
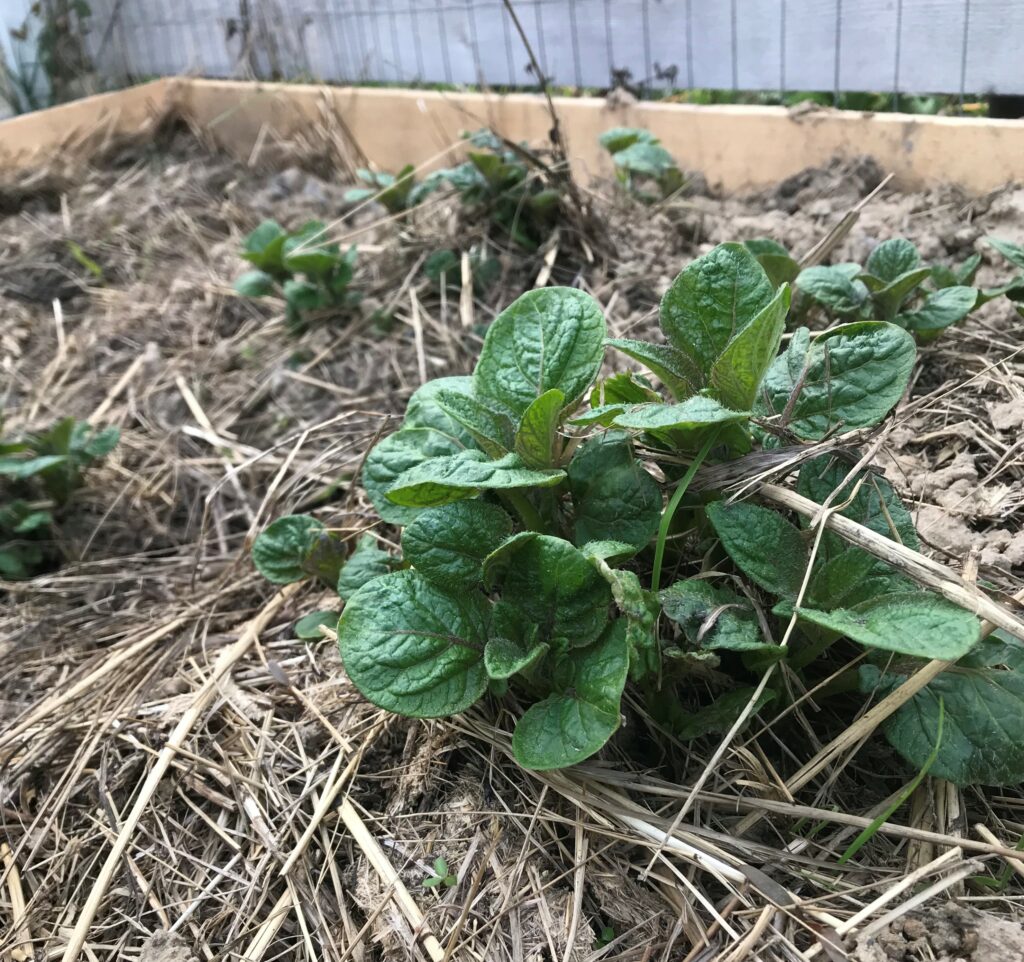
Growing potatoes in raised beds is our preferred method. The soil warms faster in the spring, the soil is loose and fertile, and the potatoes are easy to harvest. We plant our potatoes 8 inches apart in all directions.
Growing potatoes directly on the ground with hay or straw:
Want a quick and easy way to grow potatoes? All you need to do is place your seed potato directly on the ground (or first add several inches of hay or straw), then top your potatoes with a 12-inch thick covering of straw or hay. Add some 5-10-10 fertilizer and water well. As your plants being to emerge continue the process of hilling, you will need to protect the maturing tubers from sunlight. Exposing the maturing tubers to sunlight will result in the potatoes turning green, rendering them inedible.
We’ve tried this method in the past – it works; however we did have lower yields. It is an easy way to help improve the soil, especially if it’s like ours, thick, heavy, clay. You’ll end up with lovely, composted, organic matter that’s teeming with earthworms! Keep in mind hay/straw grown potatoes will also need more water.
Growing potatoes in containers/grow bags:
If your short on space or lack a suitable growing area you can grow your potatoes in containers or in grow bags. We haven’t had the best luck with this growing method – the containers can easily overheat and require frequent watering to keep the soil from drying out too much.
Water and Feeding potatoes:
Depending on your planting method, your potatoes might be extra thirsty growers. For you best harvest, keep your plants evenly moist, but not overly wet. Potatoes need at least 1- 2 inches (2.5 – 5 cm) of water per week. Inconsistent watering and dry soil can cause your tubers to become deformed and can leave the plants susceptible to diseases and viruses.
If you aren’t getting enough rain, we recommend that you water your potatoes with a deep soak several times per week. A deep watering that soaks the soil between 8 – 12 inches (20 – 30 cm) is much better than frequent light watering that only wet the soil surface. Consistency is key, you don’t want your soil to dry out. Mulching your plants can help conserve soil moisture, keep the soil cooler, and help prevent weeds.
We used a standard garden/soaker hose to water our potatoes. Just like tomatoes, overhead watering isn’t the best method for watering, because it can promote a warm and wet environment that most fungal diseases thrive in. A garden hose delivers that water directly to the soil, reduces water wastage, and can help stave of fungal diseases.
Towards the end of the growing season, when the tops of your potato plants being to turn yellow and start to die off you can begin to back off and slow down on the watering. They still need to be watered; you don’t want the beds to dry out. When it comes to harvest time drier soil is better – it makes harvesting cleaner and easier.
Your potatoes will benefit from a little fertilizer. Feed them with a 5-10-10 fertilizer before planting, and side dress them mid-season. Avoid giving your potatoes too much nitrogen, this will encourage leaf growth over tuber growth.
Harvesting your potatoes
I find that harvesting potatoes is always a fun and exciting experience. Months after planting your tubers, tending to your plants, patiently waiting, and wondering what’s happening beneath the soil, you finally get to see the fruits of your labor! You never know the exact size, shape, or yield until after harvest.
Since potatoes grow beneath the soil it isn’t readily apparent to the first-time potato grower when to harvest them. Even though you can’t see the tubers the plant will let you know when it’s time to harvest your crop. Once all the leaves and foliage on your plants withers and dry you know that harvest time is near. Wait 2 – 3 weeks after your foliage dies back, this time in the ground allows the skins on the tubers to thicken up, which will result in better storage quality. We recommend waiting for a drier weather, it makes it easier to harvest and can help prevent the potatoes from rotting in storage. It’s not a fun task to harvest potatoes when it’s wet and raining outside, you’ll be wet, and the potatoes will be caked in wet clumps of soil. Not fun and not good for storage.
To harvest your potatoes first pull out the dried and withered vines, you can add these to the compost pile. Potatoes grow underground on stems and typically reach out 10 inches from the center of the plant. You want to be gentle when harvesting, try to avoid stabbing your potatoes with a shovel or garden fork – this can bruise or cut the potatoes. If this happens, don’t stress, just put them off to the side in a separate pile. These potatoes won’t be good for storing, but you can plan on eating those potatoes first.
For traditionally planted potatoes, or those in deep raised beds, begin digging approximately one foot out on either side on the plants. You can use a shovel, garden fork, or a potato rake, to gently loosen the soil and dig out the potatoes. After harvesting the bulk of the potatoes feel around in the loosened soil for any tubers that you missed.
If you’ve planted your potatoes in hay or in containers, all you need to do is move the hay out of the way or tip your container over. Harvesting couldn’t be any faster or easier.
Once harvested, do not wash your potatoes, gently brush off any caked-on soil and allow them to dry off for an hour or two outside.
Storing and Preserving Potatoes
Before you can place your potatoes into storage you need to allow them to cure. This process will help to extend their storage life. To cure your potatoes lay them out in a single layer on newspaper, in a cardboard box, or on a tray, in a cool and dark location (50 – 60° F, 10 – 15° C) with a high humidity for one to two weeks. For best results you want them in an area that has good air circulation.
After they’ve cured for one to two weeks, check the tubers for signs of damage. If you find any that are damaged remove these, they aren’t suitable for storage, but are fine to eat fresh. You can store your harvest in a cool and dark location in cardboard boxes (poke holes in the side for ventilation), baskets, storage bins, or even paper bags. For long term storage an area that is cool (40 – 45°F, 4.5 – 7°C), has good ventilation, high humidity is ideal. Check your tubers regularly and promptly remove any that show any signs of rot or shriveling.
Under ideal storage conditions potatoes can last for six to eight months and still be of high quality.
Do you have a favorite way to use potatoes, or a great recipe to share? Be sure to leave them in the comments below.
Until Next Time…
Ashley
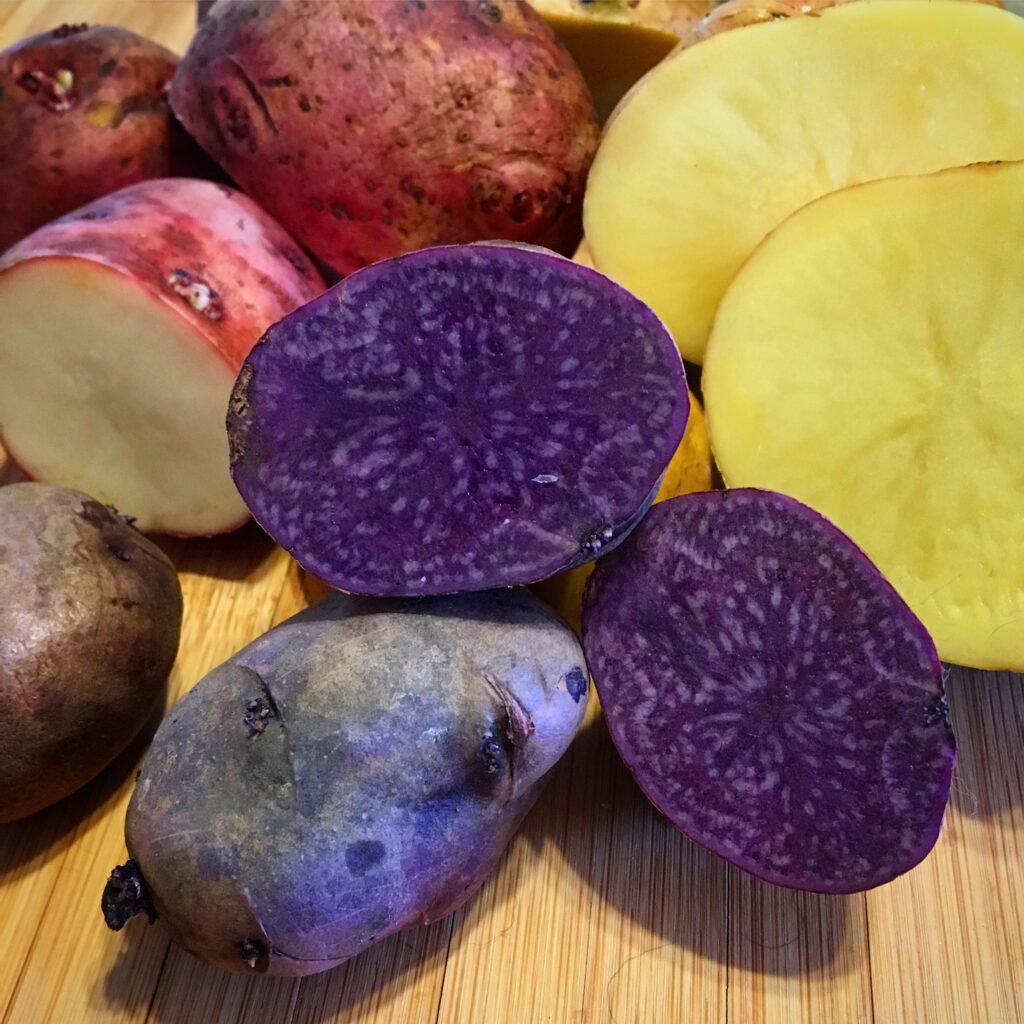
From being able to plant late Winter, to chitting, to planting whole…I learned so much! P.S. Purple potatoes are the MOST fabulous.?